Friday, January 6, 2012

Office Chair redo

We live in a college town and one of the great things about that is you can always find free furniture on every corner. This chair I found on our front porch when the apartment upstairs was being renovated and I saved it from the trash planning to fix it up and use it at my sewing table.
To refurnish your own chair you will first want to detach the cushions in order to recover. Since my chair was made out of a slick vinyl we decided to also remove the old material before adding the new home decor weight material I bought at JoAnns for less than $5. Usually I would just recover the cushions right on top of the old material.
Now, using a staple gun attach your new pretty material to one side and then the other.
Now do a corner by folding down your material on top of each other until you get a nice crease. After finishing your first corner, you will then staple down the loose side of material coming out from the finished corner. Continue to finish off the other corners and additional loose side.
Trim off excess material and at this point we reattached a square, screen-like material that came off the original chair. You could leave yours open or add a square of fabric to make it more professional looking.
The top cushion of our chair was nontraditional and made completely from metal. So no chance of stapling fabric into place. We copied the existing system and poked our material through these metal grippers and then pushed the grippers down flat all the way around.
The bottom edge I hotglued into place and then cut out a piece of material to cover the exposed back which I simply ironed under and hotglued down.
Now check your work and get ready to spray paint.
I used a shiny cherry red from Walmart for $3.47 and covered the entire metal frame.
Once dry, all that is left is to screw the cushions into place and pat yourself on the back. A cute "new" chair for less than $10.
And my favorite part? This little detail I didn't even originally realize was back here. It is a plaque indicating that this chair used to live in the library at the local university.

Wednesday, January 4, 2012

Sushi Night

I love sushi. Hubby supports my addiction and has one of his own. We have always talked about wanting to learn to make it ourselves, but never had the courage to until I stumbled on this post by Favorite Family Recipes.
It turned out so yummy and satisfying since we were able to do it ourselves. Here are the different rolls we have tried:

avocado
cucumber
tempura mini shrimp
sesame seeds
nori
rice
**for this one we had the nori on the outside which creates a nice little package which is easy to pick up with chopsticks.

Thai hot chili mayonnaise
celery
carrot slightly cooked with a little honey
mini shrimp
sesame seeds
nori
rice
**for this one we tempura fried the outside. Although it didn't look perfect, it tasted so good. Since doing this I have looked up how you are actually suppose to tempura fry a sushi roll and it seems like all we needed to do was dredge the whole thing in cornstarch. I'll try that next time.

jalapeno powder
cream cheese
tempura mini shrimp
celery
carrot
sesame seeds
nori
rice
**for this one we tried the rice on the outside and it was nice to switch it up, but we had a hard time keeping it all together and cutting the roll. Maybe there is a secret I am missing.

Serve with soy sauce and wasabi.
Now go be bold and try it yourself! Or am I the only one scared of rolling my own sushi?

Monday, January 2, 2012

Twenty Twelve

Well it's a whole new year and I am so excited for it. I don't usually do new year's resolutions, but one thing I would like to accomplish during this next year is to train for a marathon. I may not get very far on my training, but it is nice to think about... Happy New Year!
Also, have you been to Goblin Valley? It is this whole maze of crazy rock formations which you can run wild and explore. We went with 7 kids, 2 dogs, and 8 adults and it was the perfect day.

Friday, December 30, 2011

Snowman Kits

I wanted a gift to give to a couple of families on my Christmas list this year and I came up with the idea for snowman kits. I am just bummed we haven't had enough snow for me to try one out yet.
And here is how I put it all together:
To make one kit, you will need 3 buttons, 8 beads, black spray paint, dowel, orange Sculpey, material for scarf, black felt, material for bag, white felt, wood glue, and sewing supplies. I bought most of my supplies on sale at JoAnns or either I had what I needed on hand already. Here is the rundown...
bag of buttons $3.59
bag of beads $3.99
shiny black spray paint $1 (from Walmart)
5/16 in dowel $0.59
sweet potato Sculpey $1.14
3/4 yrd red cozy flannel 1.87
3/4 yrd hunter cozy flannel $1.87

Start by marking off your dowel every few inches and cut with a saw. You will need 11 small sections for the eyes, mouth, and buttons. You will also need a much longer section for the nose.
Now add a little wood glue on the back of each of the buttons and inside each of the beads to be used for the eyes and mouth. Let dry.
Then give the eye and mouth pieces a couple of coats of shiny black spray paint.
I love how the carrot noses turned out. Take a scrap piece of wooden dowel and cover it with orange Sculpey, purposefully making it lumpy and imperfect. Then go at it with a butter knife making random lines all over. Follow the directions on the package and bake in the oven. I am pretty sure it took two Sculpey packages to make these three.
For the scarves I just bought the cheapest fabric I could find at JoAnns, cut it and sewed some pieces together to make it long enough. Then fray the ends if you like and you are done. In hindsight I should have looked only for fabric at least 60 inches wide and then there would be no need for sewing at all. It would have been long enough on its own.
To keep everything together make a drawstring bag with a circle bottom and sew a felt snowflake to the outside. I made my snowflake by first cutting a template out of paper (you know, the way you learned in school? By folding the paper up and then cutting up the edges with scissors?) and then pinning it to my felt to cut out.
And lastly the top hat. I love these! They were actually pretty quick to put together and turned out just how I wanted them to. I followed the tutorial at the end of this post from Make It Do. Now go make your own and hopefully you will be blessed with snow and the time to go enjoy it.

Wednesday, December 28, 2011

Polaroid Magnets

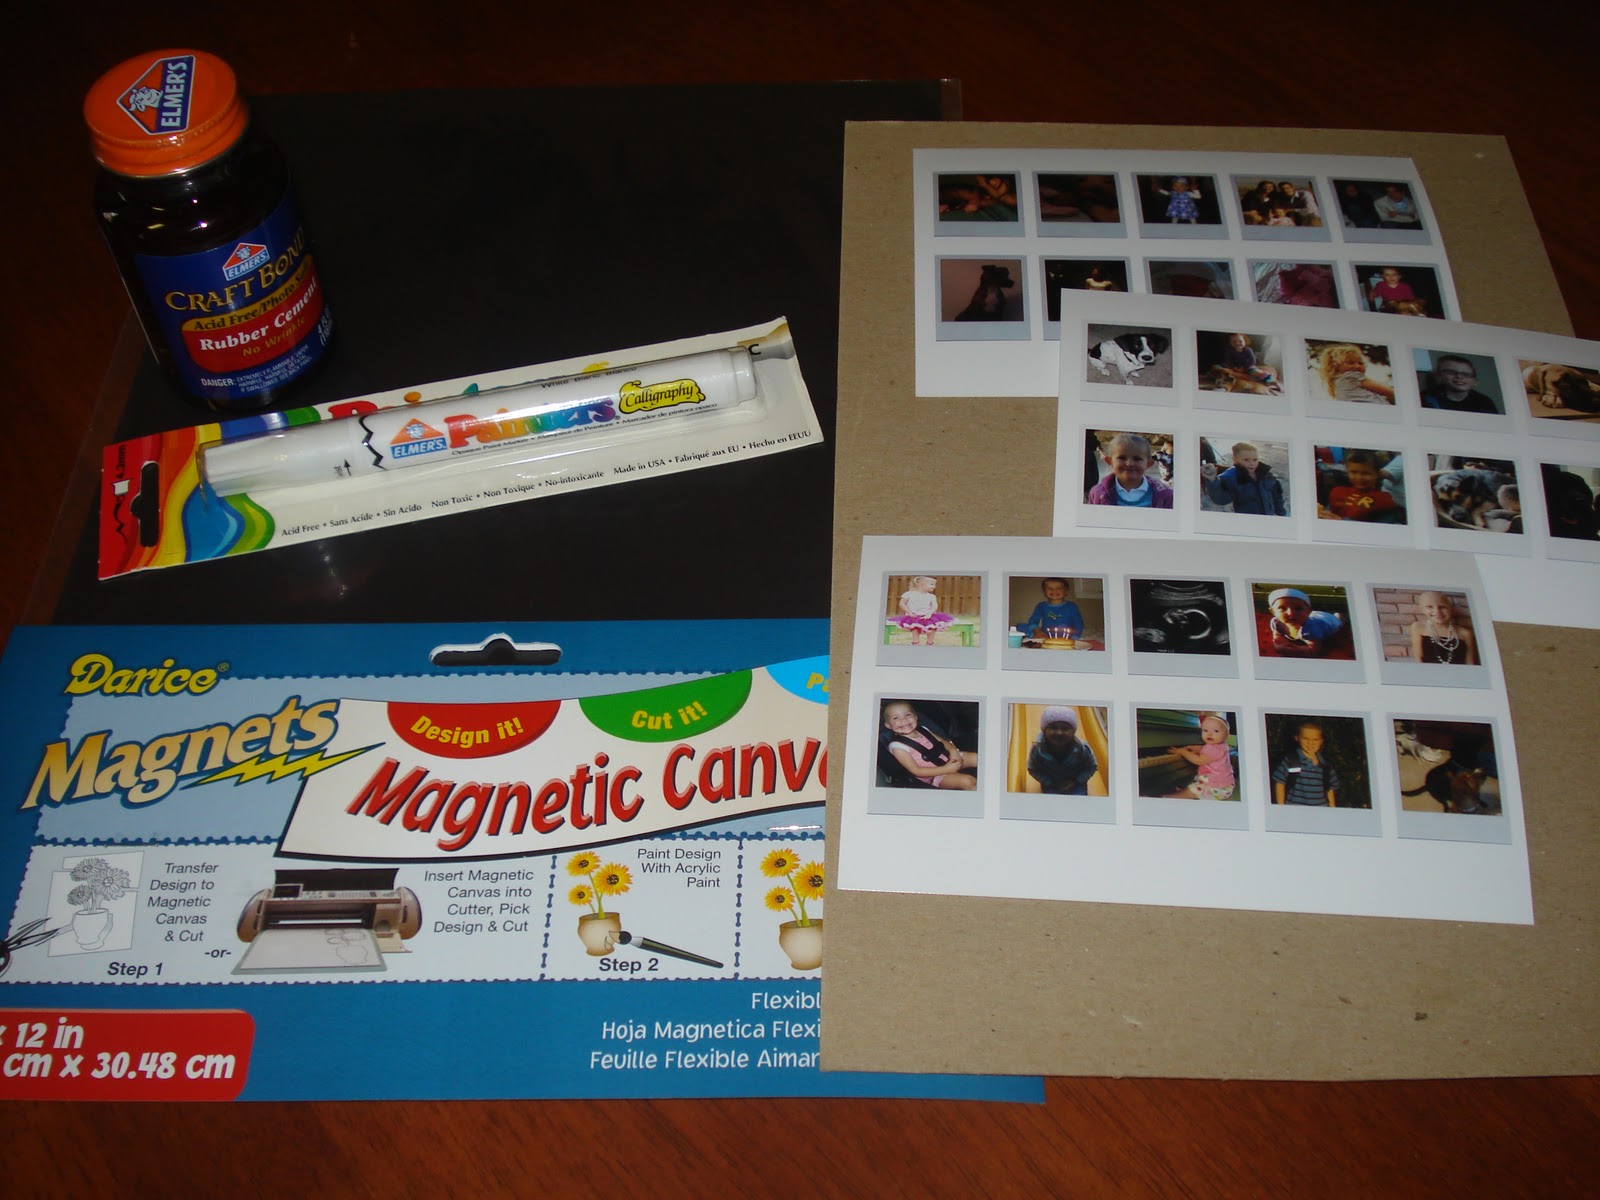
I found these tiny magnets on design mom ages ago and knew they would be a cute gift someday. They are inexpensive and can be assembled during a child's nap time. The trickiest part for me was the prep work. I used the template Ambrosia Girl graciously provided which was perfect, but I had to first learn how to use photoshop in order to use it. Thankfully hubby could teach me a few tricks and it wasn't long until I was sending the photos off to Costco to be printed.
The three 4x6 photos were about $0.40 total and the paint pen, rubber cement, and large magnet sheet were each less than $3. I also used the cardboard backing of an old notebook and some packing tape I had laying around. These supplies easily produced 30 magnets.
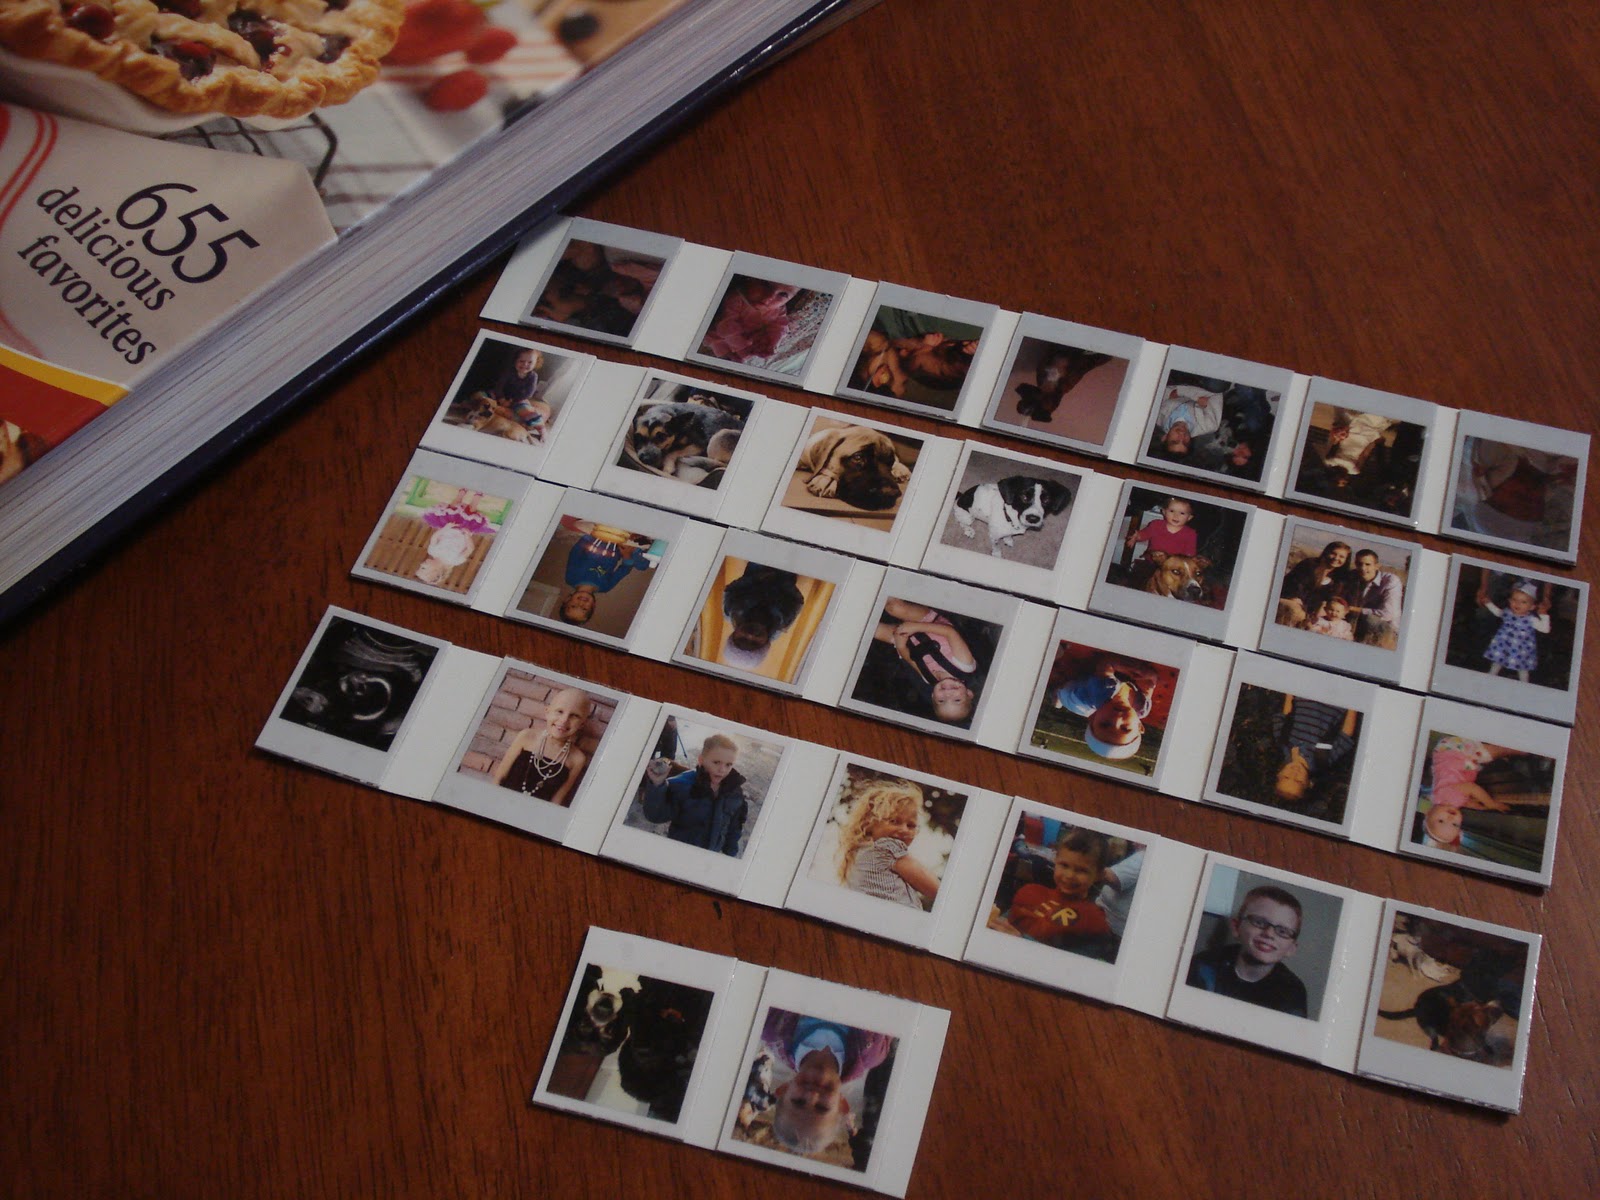
First you need to glue the pictures to the cardboard. Let that dry a little and then you will "laminate" each row of photos with a length of packing tape. At this point I cut each picture out and glued them to the magnet sheet. You don't have to cut them all out first, but I didn't want to waste space on my magnet (do make sure and glue to the non-magnetic side or else your magnets won't stick to the fridge). After gluing the pictures to the magnet I let them sit under a heavy book for awhile to make sure they stayed glued together really well and would be nice and flat. Then cut each polaroid out individually.
Now your project is complete unless you choose to finish up by painting the sides white to give them a polished look. It didn't seem to make much difference to me so I nixed that extra step. Put them on your fridge and enjoy.
Oh and that little girl in the photo up there? That's me three days after my first birthday on Christmas morning.

Monday, December 26, 2011

Merry Christmas

I hope your weekend was filled with waffles and sliced strawberries to top just like mine was! Merry Christmas weekend everyone.

Friday, December 23, 2011

Our Tree


I love our tree. It smells so wonderfully and it makes me smile every time I glance in its direction. I spent a long time thinking about what to do about making our own ornaments and finally I went with hubby's plan: origami. I am no origamist, but hubby spent countless hours keeping himself busy in church as a boy folding and making these little creations.
For the tree we decided on cranes and a star for the top which hubby came up with his own special design. In our front window we also made ninja stars to hang from ribbon.
Christmas is a magical time for me. I hope you all can enjoy peace at this time of year and are able to spread it to those around you as well. Have a wonderful Christmas.

Wednesday, December 21, 2011

Earflap Hat for all ages

I just finished up another gift for my daughter. It's this cute little earflap hat that really took no time at all. The pattern is free from Neanners Shop and easy enough to follow. I love the braids on either side and I know my little girl will love playing with them as well. Also it comes with directions for sizes newborn-adult so I am thinking hubby and I need matching hats as well... or is that too cheesy?
About the pattern: Instead of working this holding two strands together I worked it with only one and it turned out fine. The main yarn I used was a dusty purple from Lion Brand.