

Monday, October 31, 2011
Happy Halloween
Monday, October 24, 2011
a Costume for Hubby

Since I am going to be a flower for Halloween and my little girl a ladybug, hubby decided he would be a spider. I have been racking my brain trying to figure out the best way to give him four more legs, but for starters I thought I would finish the easy part of the costume: giving him six extra eyes.


And now if I run out of time Hubby will still have a simple costume even if I can't finish those giant black legs to match. Did I mention I hate spiders?


Friday, October 21, 2011
Candle Centerpiece
For some reason I am more excited about this Halloween than I usually am. Maybe everything is just more exciting with a kid around.


Anyway I had the idea to put this Halloween themed thing together one day while waiting around for the plumber to vacate my house. All the materials I had on hand except for the candle which I think was about $4 at Sears. It started as a way to use up this old candy corn from last year that hubby bought and turned out to be awful. (By the way, I found two more bags of the stuff later. I swear it is multiplying.)

I added some rubber snakes I bought at a yard sale and figured that for 50 cents this bag of creatures could come in handy at times. The black material around the vase is a sleeve I cut out of an old long-sleeved sweater. I didn't glue it on because I want to be able to reuse the vase and the sleeve ended up being the perfect size to fit snuggly around it.

I hot glued the orange flower onto the sleeve which I already had made as a leftover from my wreath. Then I added my candle and I was done.

Done until I later decided to cutout felt bats to tape all over the wall my table sits against. Now I am done. A little Halloween decorating on a budget. Now if I could just think of what to do with the rest of the candy corn.
Monday, October 17, 2011
Pumpkin-less Jack-O-Lantern


I found a tutorial for these here if anyone is interested.
Friday, October 14, 2011
Wreath Redo: Halloween

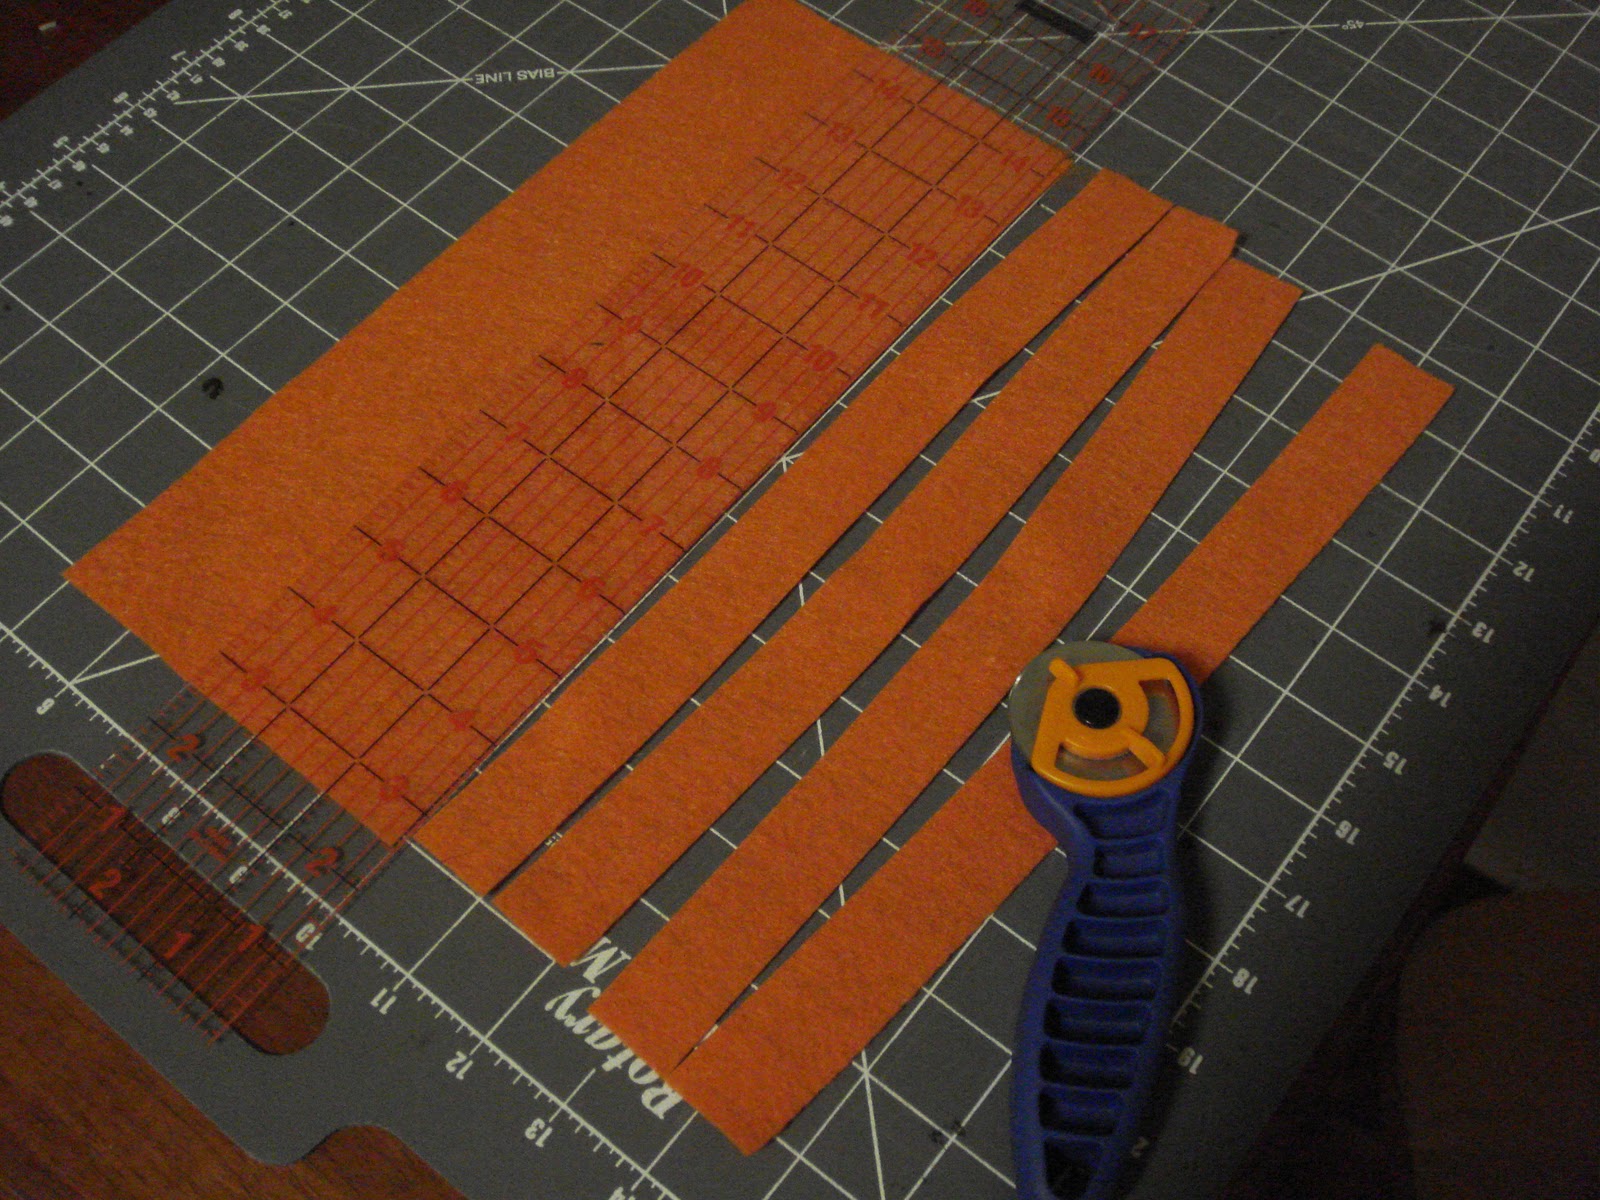
It's time for my wreath to get a makeover now that we are coming up on Halloween. I stripped my wreath down, but kept the muslin wrapped around it and added 1/4 yard of black halloween lace for $0.80 and two sheets of 9x12 felt for $0.25 each all from JoAnns. The rubber spider was a budget buster at $3 from Walmart.


I cut my sheets of felt into one inch strips and used this tutorial to make my flowers. These flowers are a bit more of a pain than the easy peasy fabric rolled flowers, but they created a cool effect that I really wanted for this wreath. The hard part is just having the patience to cut every little strip along the felt one by one.


I can't wait for my little girl's first Halloween.
Wednesday, October 12, 2011
To Match My Ladybug


I glued another circle of brown felt onto the bottom of the sunflower and then glued a small strip onto that to slide my headband through. (The headband was also from JoAnns for $0.99 and is 5/8 inch wide)

I think it turned out so cute and it was easy enough to make. Some parts were fairly tedious, but sitting infront of the television with hubby while working on this helped with the monotony.
Monday, October 10, 2011
Costumes
Last Halloween we had two different occasions to dress up. I was super pregnant at the time so we had a little fun with it. First up we went as m&m's:
 I simply cut-out the m shape from sheets of white felt and then we pinned them on to our shirts with safety pins from the inside-out. A cute little costume for about 60 cents for the both of us.
Next up: the Juno couple.


For this one we used clothes we had on hand and bought name tags and sweatbands for hubby.
Here's a list of our other contenders:
Housewife and Milkman
Santa Clause and elf/reindeer
Bun-in-the-oven and Baker
Squasher and Zombie (from plants vs. zombies the game)
Pumpkins
Woman in labor and Super-Dad (Hubby would wear a tool belt with baby supplies)
Next up: the Juno couple.


Here's a list of our other contenders:
Housewife and Milkman
Santa Clause and elf/reindeer
Bun-in-the-oven and Baker
Squasher and Zombie (from plants vs. zombies the game)
Pumpkins
Woman in labor and Super-Dad (Hubby would wear a tool belt with baby supplies)
Friday, October 7, 2011
Chocolate Chip Cookies

This is hubby's favorite chocolate chip recipe:
Mix together:
1 cup sugar
1 cup brown sugar
2 cubes of butter
Add:
2 eggs
2 tsp. Vanilla
1 tsp. Baking soda
1 tsp. Baking powder
1/2 tsp. Salt
3 cups of flour
chocolate chips (however many you prefer)
Roll into golf balls and bake at 375 degrees for about 8 minutes on an ungreased cookie sheet. You'll take them out before they look completely done and they'll finish baking while they cool on the cookie sheet.
This makes about 4 dozen.

If I am just making these for us I usually bake a dozen and roll the rest of the batch and freeze them on a cookie sheet like you see above. Once they are good and frozen I put them all in a big ziploc bag and store them in the freezer until we want more cookies. I don't know how long they would last, probably a couple of months? We usually finish them off pretty quickly and to be honest, quite a few get eaten raw right from the freezer.
Wednesday, October 5, 2011
Yarn Letter

One night after my little girl had gone to bed and hubby was out of town for work I was surfing blog land and found this. I immediately wanted to try it out and found my supplies around the house. First I took apart my picture board to shorten it a bit which I had been needing to do anyway. It was made out of cheap particle board. The end that I chopped off I hand-drew a J for my daughter's initial.
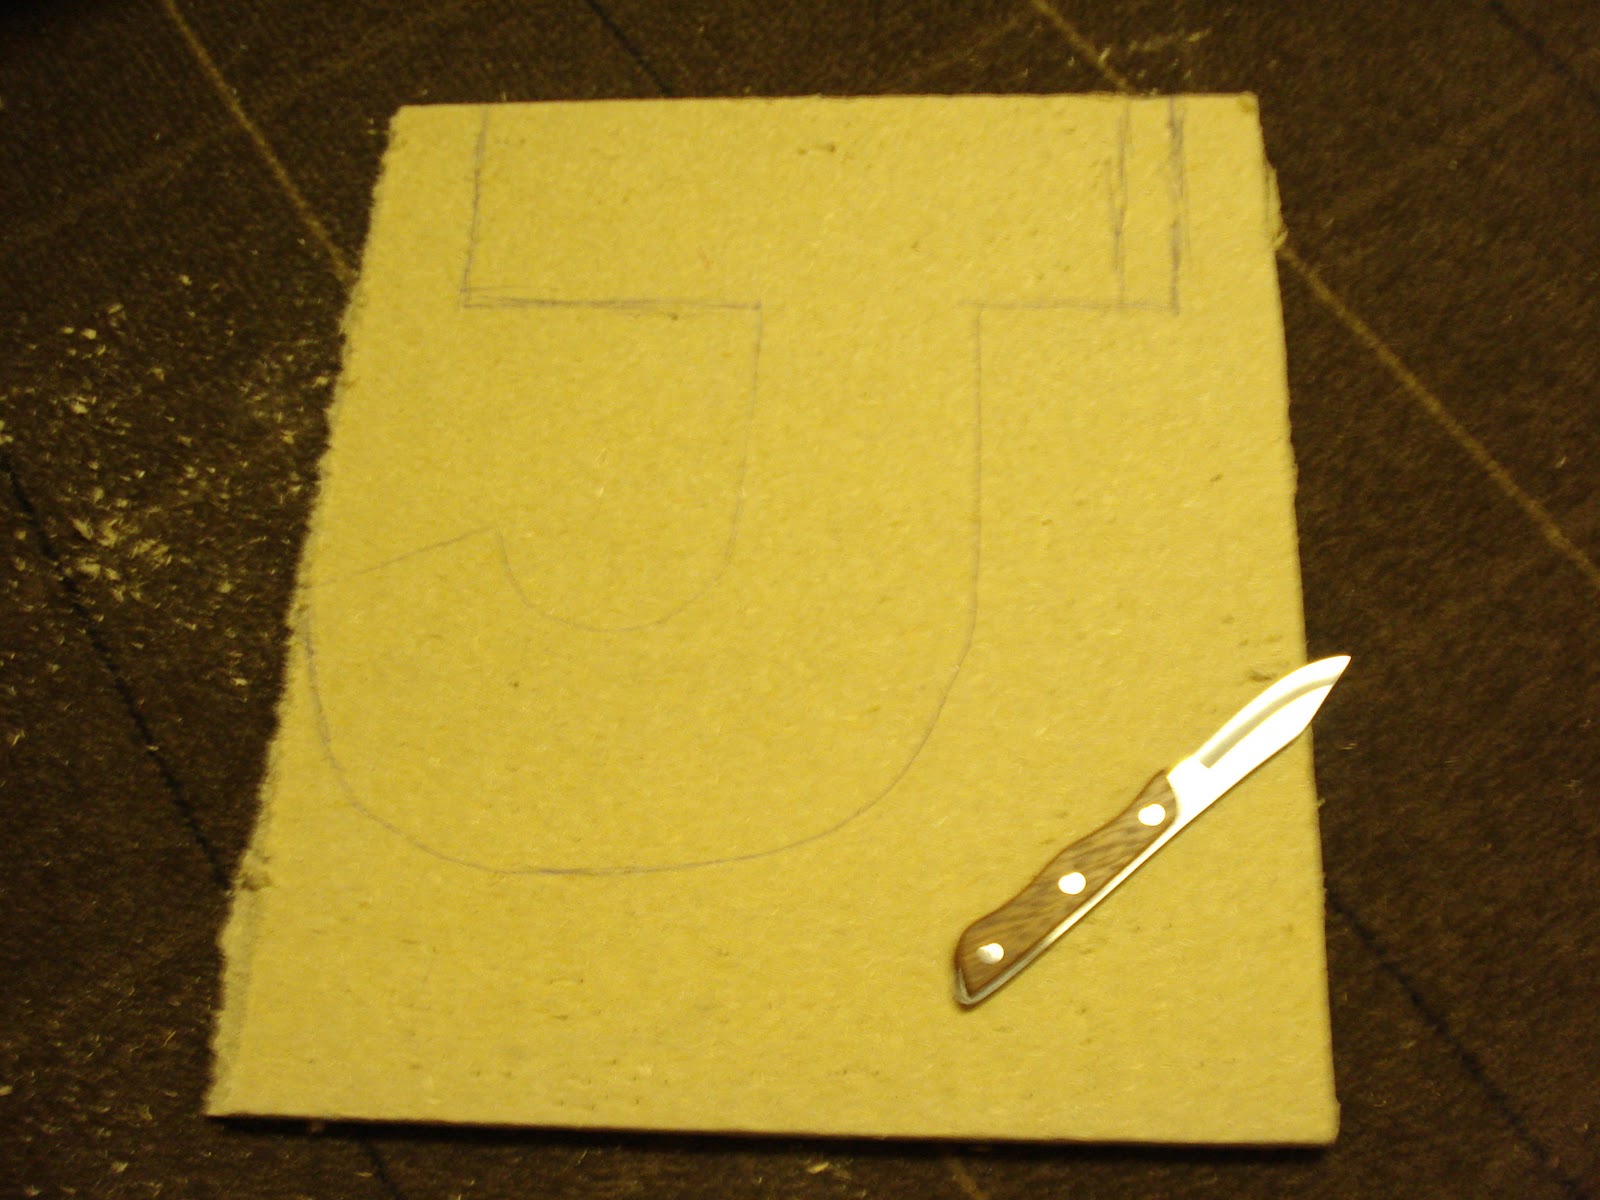
I couldn't find hubby's box cutter (which would have been perfect) so I opted for an old knife.

The board kind of disintegrated and it was really hard to make clean lines so therefore I ended up losing the bar on top of my J but I just went with it. Then I cozied up in front of the television and began wrapping until I ran out of yarn.


The end. One more thing to warm up the nursery.

Monday, October 3, 2011
My Living Room Wall(s)


I stained my grass, but it disappeared surprisingly quickly. Next time I would use towels or a sheet or something because the grass and leaves got in my way a little and was a bit annoying.

I love this huge wall of pictures. Our ceilings are so tall which created this huge blank wall. I was able to fill it up pretty nicely with all of these frames.

btw, when printing out the pictures, I found that Costco by far was the cheapest especially for my larger, poster-sized prints. And they printed in about an hour at no extra cost.
Subscribe to:
Posts (Atom)
